Workspace Tour
Orbit's interface is designed so you can see everything at once: the file's structure in the sidebar, object motion in the 3D scene, audio levels in the meters, and the full timeline below. This page walks you through each area.
Sidebar
The sidebar has two tabs accessible via a segmented control at the top: Objects and Settings.
Objects tab
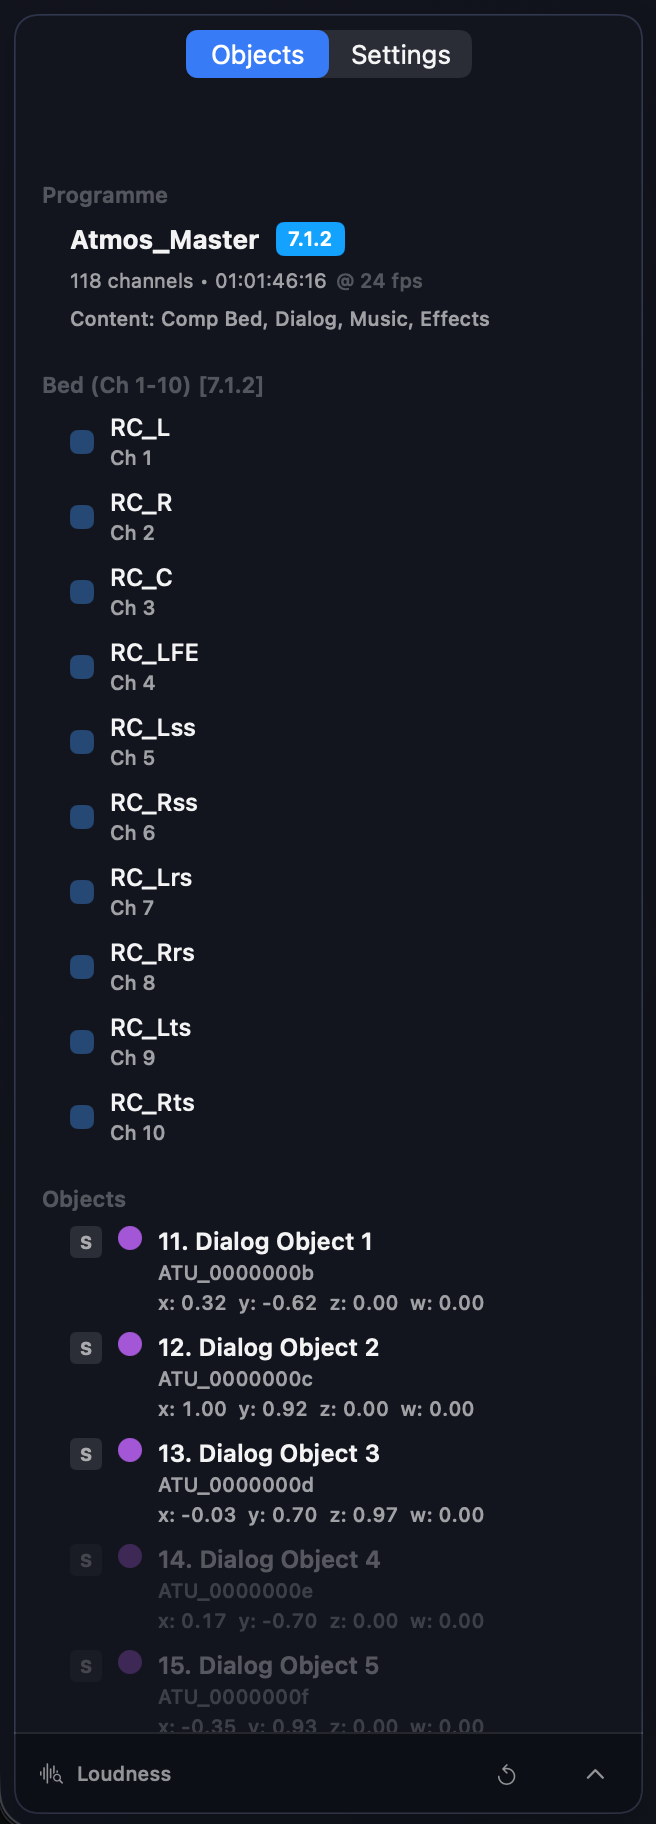
This is your home base for understanding what's in the ADM file. It shows:
- Programme section: The programme name, total duration, bed format badge, and content groups. This gives you quick confirmation that you've loaded the right file.
- Beds section: All bed channels with blue activity indicators. Beds anchor the mix — they're the channel-based foundation.
- Objects section: Each object with live position readouts (X, Y, Z), activity indicators that pulse with audio level, and individual solo toggles.
Working with objects:
- Click an object to select it — a white ring appears around it in the 3D view so you can track its position.
- Shift+Click selects a range; Command+Click toggles individual objects in and out of your selection.
- Click the S button to solo an object and hear it in isolation. Soloed objects show a yellow ring.
- Object rows dim and brighten based on audio activity, so you can see at a glance what's contributing sound.
Settings tab
This is where you configure how Orbit plays back audio:
- Output & Devices: Choose your output device, pick a monitoring mode (7.1.4, Binaural, or Stereo), and see any channel warnings.
- Spatial Options: Select an HRTF profile for binaural rendering, adjust quality settings, load a custom SOFA file, or switch between Direct and VBAP bed routing.
Loudness panel
The loudness panel sits at the bottom of the sidebar and is always visible. Expand it to see:
- Integrated, Short-term, and Momentary LUFS readings
- True Peak levels (left and right)
- A Source toggle to switch between Session (live measurements from playback) and Programme (loudness metadata embedded in the ADM)
- A Reset button to clear live measurements and start fresh
Timeline & waveforms
The timeline runs along the bottom of the window and is your primary navigation tool.
What you see:
- The header shows the programme name and transport controls (Play/Pause, Stop)
- The waveform display fills most of the space, with a playhead that tracks your position
- A timecode readout shows exactly where you are
Two waveform views let you inspect your content in different ways:
- Spatial view: A single combined waveform with color-coded panning. Left content appears cyan, center content uses your theme color, and right content appears orange. This is great for seeing overall spatial movement and density at a glance.
- Multichannel view: Twelve individual waveforms, one for each speaker in the 7.1.4 layout (L, R, C, LFE, Ls, Rs, Lrs, Rrs, Ltf, Rtf, Ltr, Rtr). Essential for verifying bed routing and checking which speakers are active at any moment.
In Multichannel view, you can adjust the height (Compact, Medium, or Large) to balance detail against screen space.
Waveforms respect mute and solo states — if you mute the bed, you'll see it reflected in the display. Drag anywhere on the waveform to scrub through the audio.

For a deep dive into waveform views and QC workflows, see Timeline & Transport.
3D scene visualizer
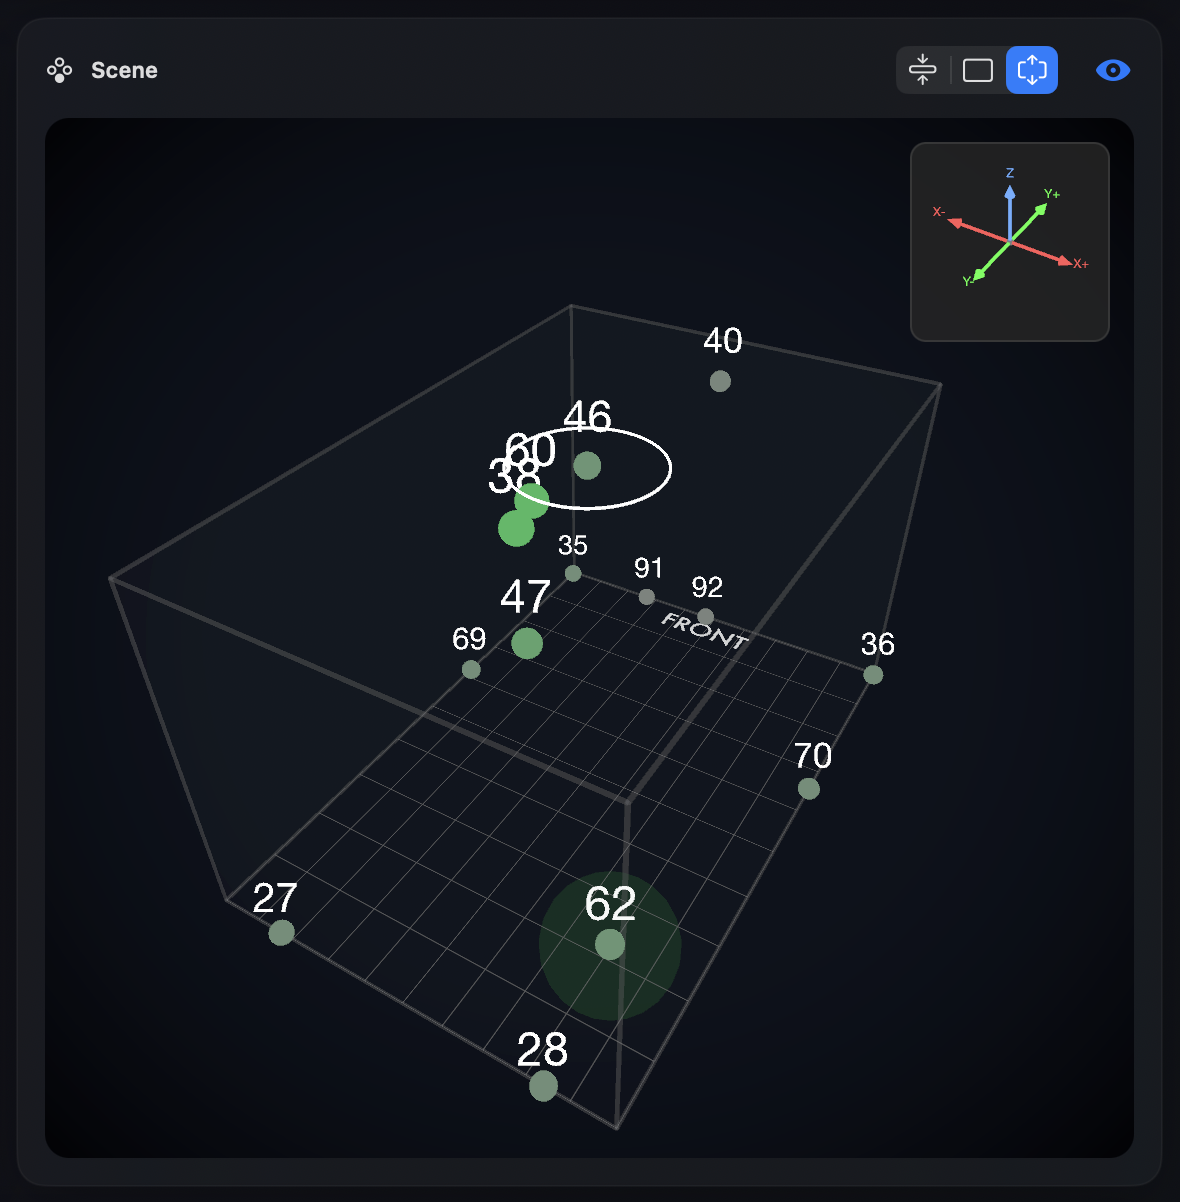
The 3D scene gives you a spatial picture of your mix. A stylized room shows numbered object markers that move in real time as ADM automation plays back.
What to look for:
- Objects that appear stuck when they should be moving
- Sudden jumps or discontinuities in position
- Height moves that don't match your expectations
- Silent objects that should be active (they'll appear smaller and dimmer)
Objects respond to audio levels: active objects grow larger and more prominent, while quiet objects shrink back. This makes it easy to see what's contributing sound at any moment.
Customization (via the View menu):
- Resize the scene (Small, Medium, Large) or hide it entirely
- Choose an object color theme (Pink, Blue, Green, Purple, Yellow)
- Switch between Cube (1:1:1) and Room (2:3) proportions
- Toggle the front indicator on or off
For more details, see 3D Visualizer.
Meters
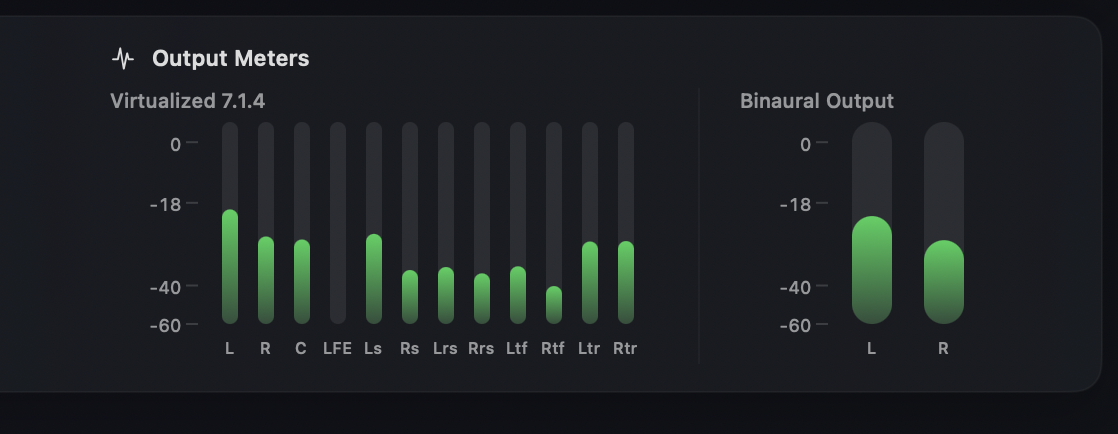
The meters appear in the footer and adapt to your current monitoring mode:
- 7.1.4 mode: Twelve channel meters, one for each speaker
- Binaural mode: Left and right binaural output meters, with optional virtualized 7.1.4 meters (as shown below) via View → Show Virtualized 7.1.4 Meters in Binaural Mode
- Stereo mode: Left and right stereo meters
All meters update in real time during playback and scrubbing, giving you immediate feedback on levels.
For meter scales and loudness details, see Meters & Levels.
Footer
The footer spans the bottom of the window and contains three main areas. You can move it to the top via View → Meters & Output at Top for a top meter bar approach (our preferred layout).
Solos & Mutes (left)
A grid of controls for isolating parts of the mix:
- Content controls: Large tiles for Bed (blue) and Objects (purple), each with Solo (S) and Mute (M) buttons
- Speaker controls: A grid for L/R, Center, LFE, Surrounds, and Heights — useful for checking specific speaker groups
- Clear button: Resets all solos at once, including any per-object solos you've set in the sidebar
Each tile shows real-time activity, so you can see what's playing even before you solo it.
Head Tracking (center)
This section appears when you're in Binaural mode:
- Source buttons: Choose between AirPods or Camera tracking
- Power toggle: Turn head tracking on or off
- Recenter button: Reset your neutral head position
- Pose visualizer: A small display showing your current yaw, pitch, and roll
Output Meters (right)
The same meters described above, positioned for easy reference while you work with the solo/mute controls.

For more on monitoring options, see Monitoring Modes.
Header controls
The header bar at the top of the window contains:
- Load ADM button: Opens a file picker to load a new ADM BWF
- Programme info: The name and basic details of the loaded file
- Transport controls: Play/Pause and Stop (Stop rewinds to the beginning after a brief fade)
- Master fader: A horizontal slider controlling overall output level from -60 to +12 dB. Option+click resets it to 0 dB.
- Technical badges: Sample rate, bit depth, and frame rate of the current file

Activity Grid (Split layout)
For a different perspective on your mix, try View → Layout → Split View. This adds an Activity Grid alongside the 3D scene.
The Activity Grid shows hexagonal tiles for each bed and object:
- Tiles pulse with real-time activity levels
- Click a tile to select that element; double-click to solo it
- Beds appear in blue; objects use your current theme color
- Tiles dim when implicitly muted and glow when active
This view is especially useful when you want to see all active elements at once without scanning through the sidebar list.
