
Appearance
Speaker Configuration
The Speaker Configuration window is where you tell Orbit about the room you're listening in — the virtual 7.1.4 studio used for binaural, and the real speakers in your physical room.
Open it from Speaker Layout & Routing, or from the Configure… button in the sidebar's Monitoring tab.
Standard and Pro
Both tabs — Virtual Studio and Physical — are available in every edition. The room you monitor in isn't an upsell.
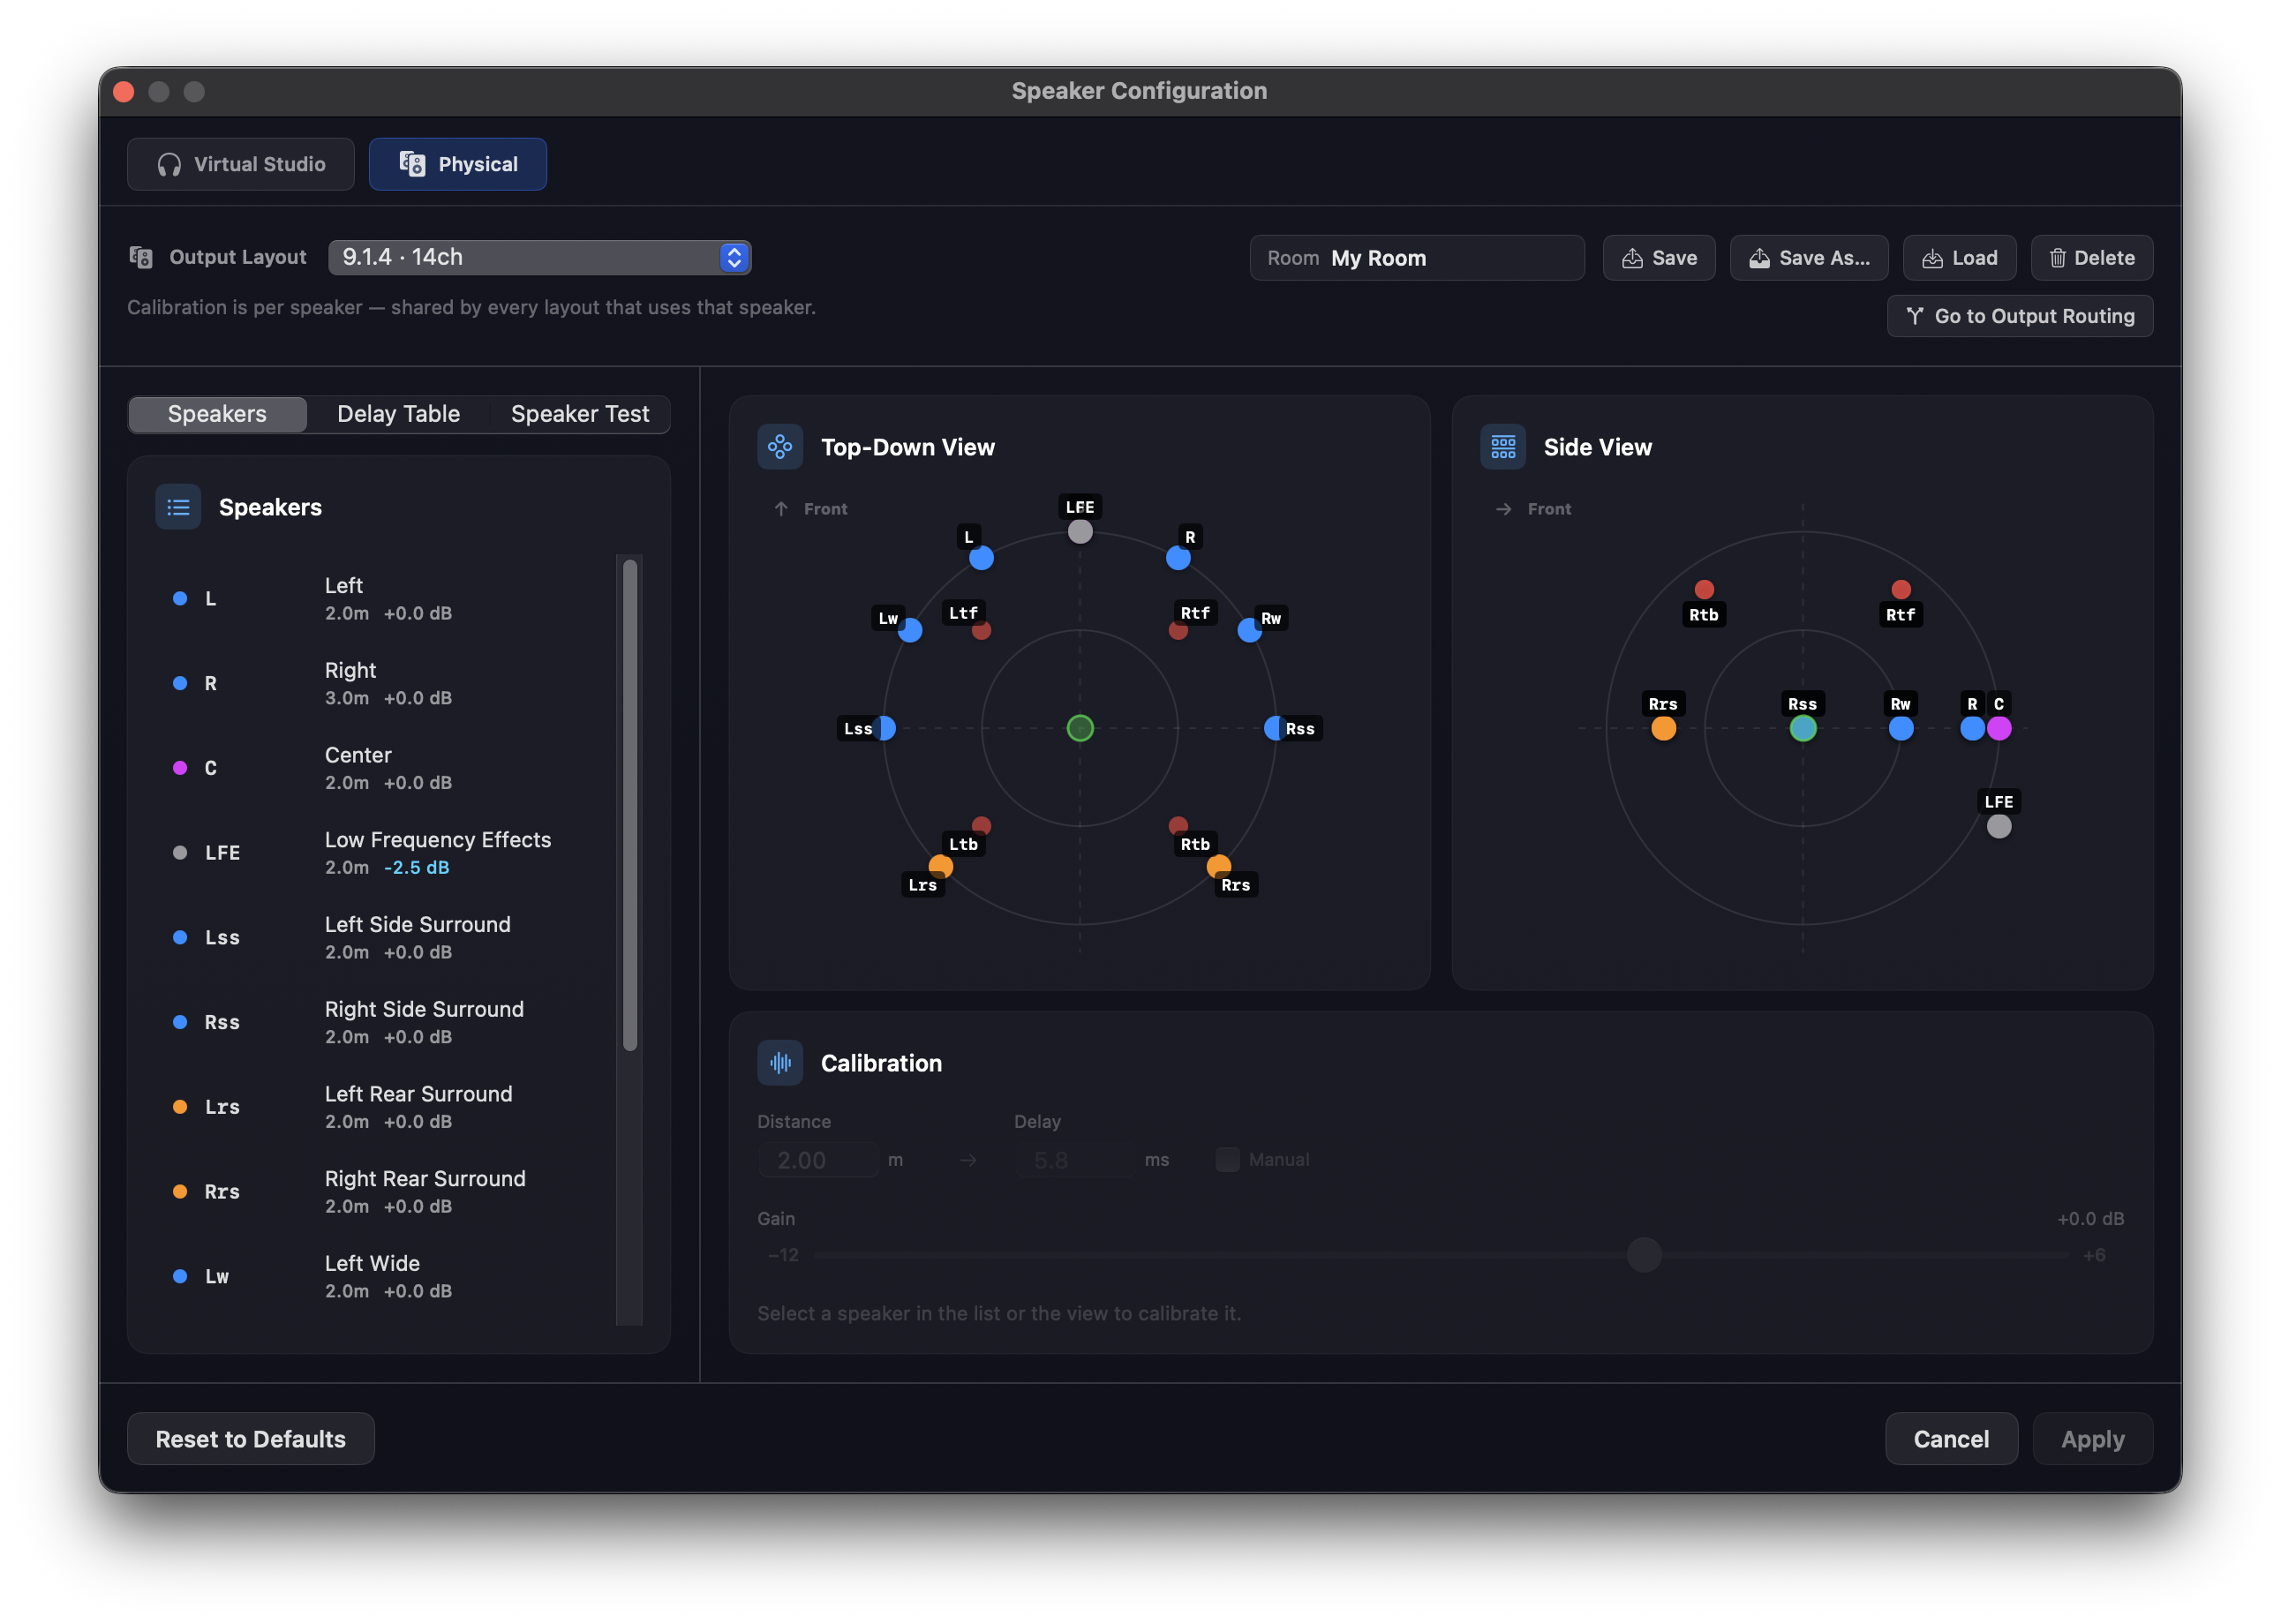
The window has two tabs, and they describe two different rooms:
| Tab | What it configures | Applies to |
|---|---|---|
| Virtual Studio | Where Orbit's virtual 7.1.4 speakers sit around your head | Binaural monitoring |
| Physical | Distance, delay and gain for the real speakers in your room | Multichannel monitoring |
Changing layout from the sidebar
You don't have to open Preferences to change speaker layout. With Multichannel selected, the sidebar's Monitoring tab shows your speaker layout as a menu — blessed layouts and your own imported .osls layouts together — with a Configure… button next to it that opens this window.
Picking a layout here changes it everywhere: the routing matrix, the Monitor view and the engine all follow.
Check your interface can carry it
If the layout needs more output channels than your interface has, Orbit tells you so — for example "Fireface UFX has 6 output channels. 7.1.4 needs 12 — select an output device with at least 12 outputs to monitor this layout." Without that warning, choosing 7.1.4 on a 6-output interface quietly monitors 5.1 instead, which is a confusing thing to debug by ear. A Go to Output Routing button takes you straight to the device and routing controls.
Virtual Studio
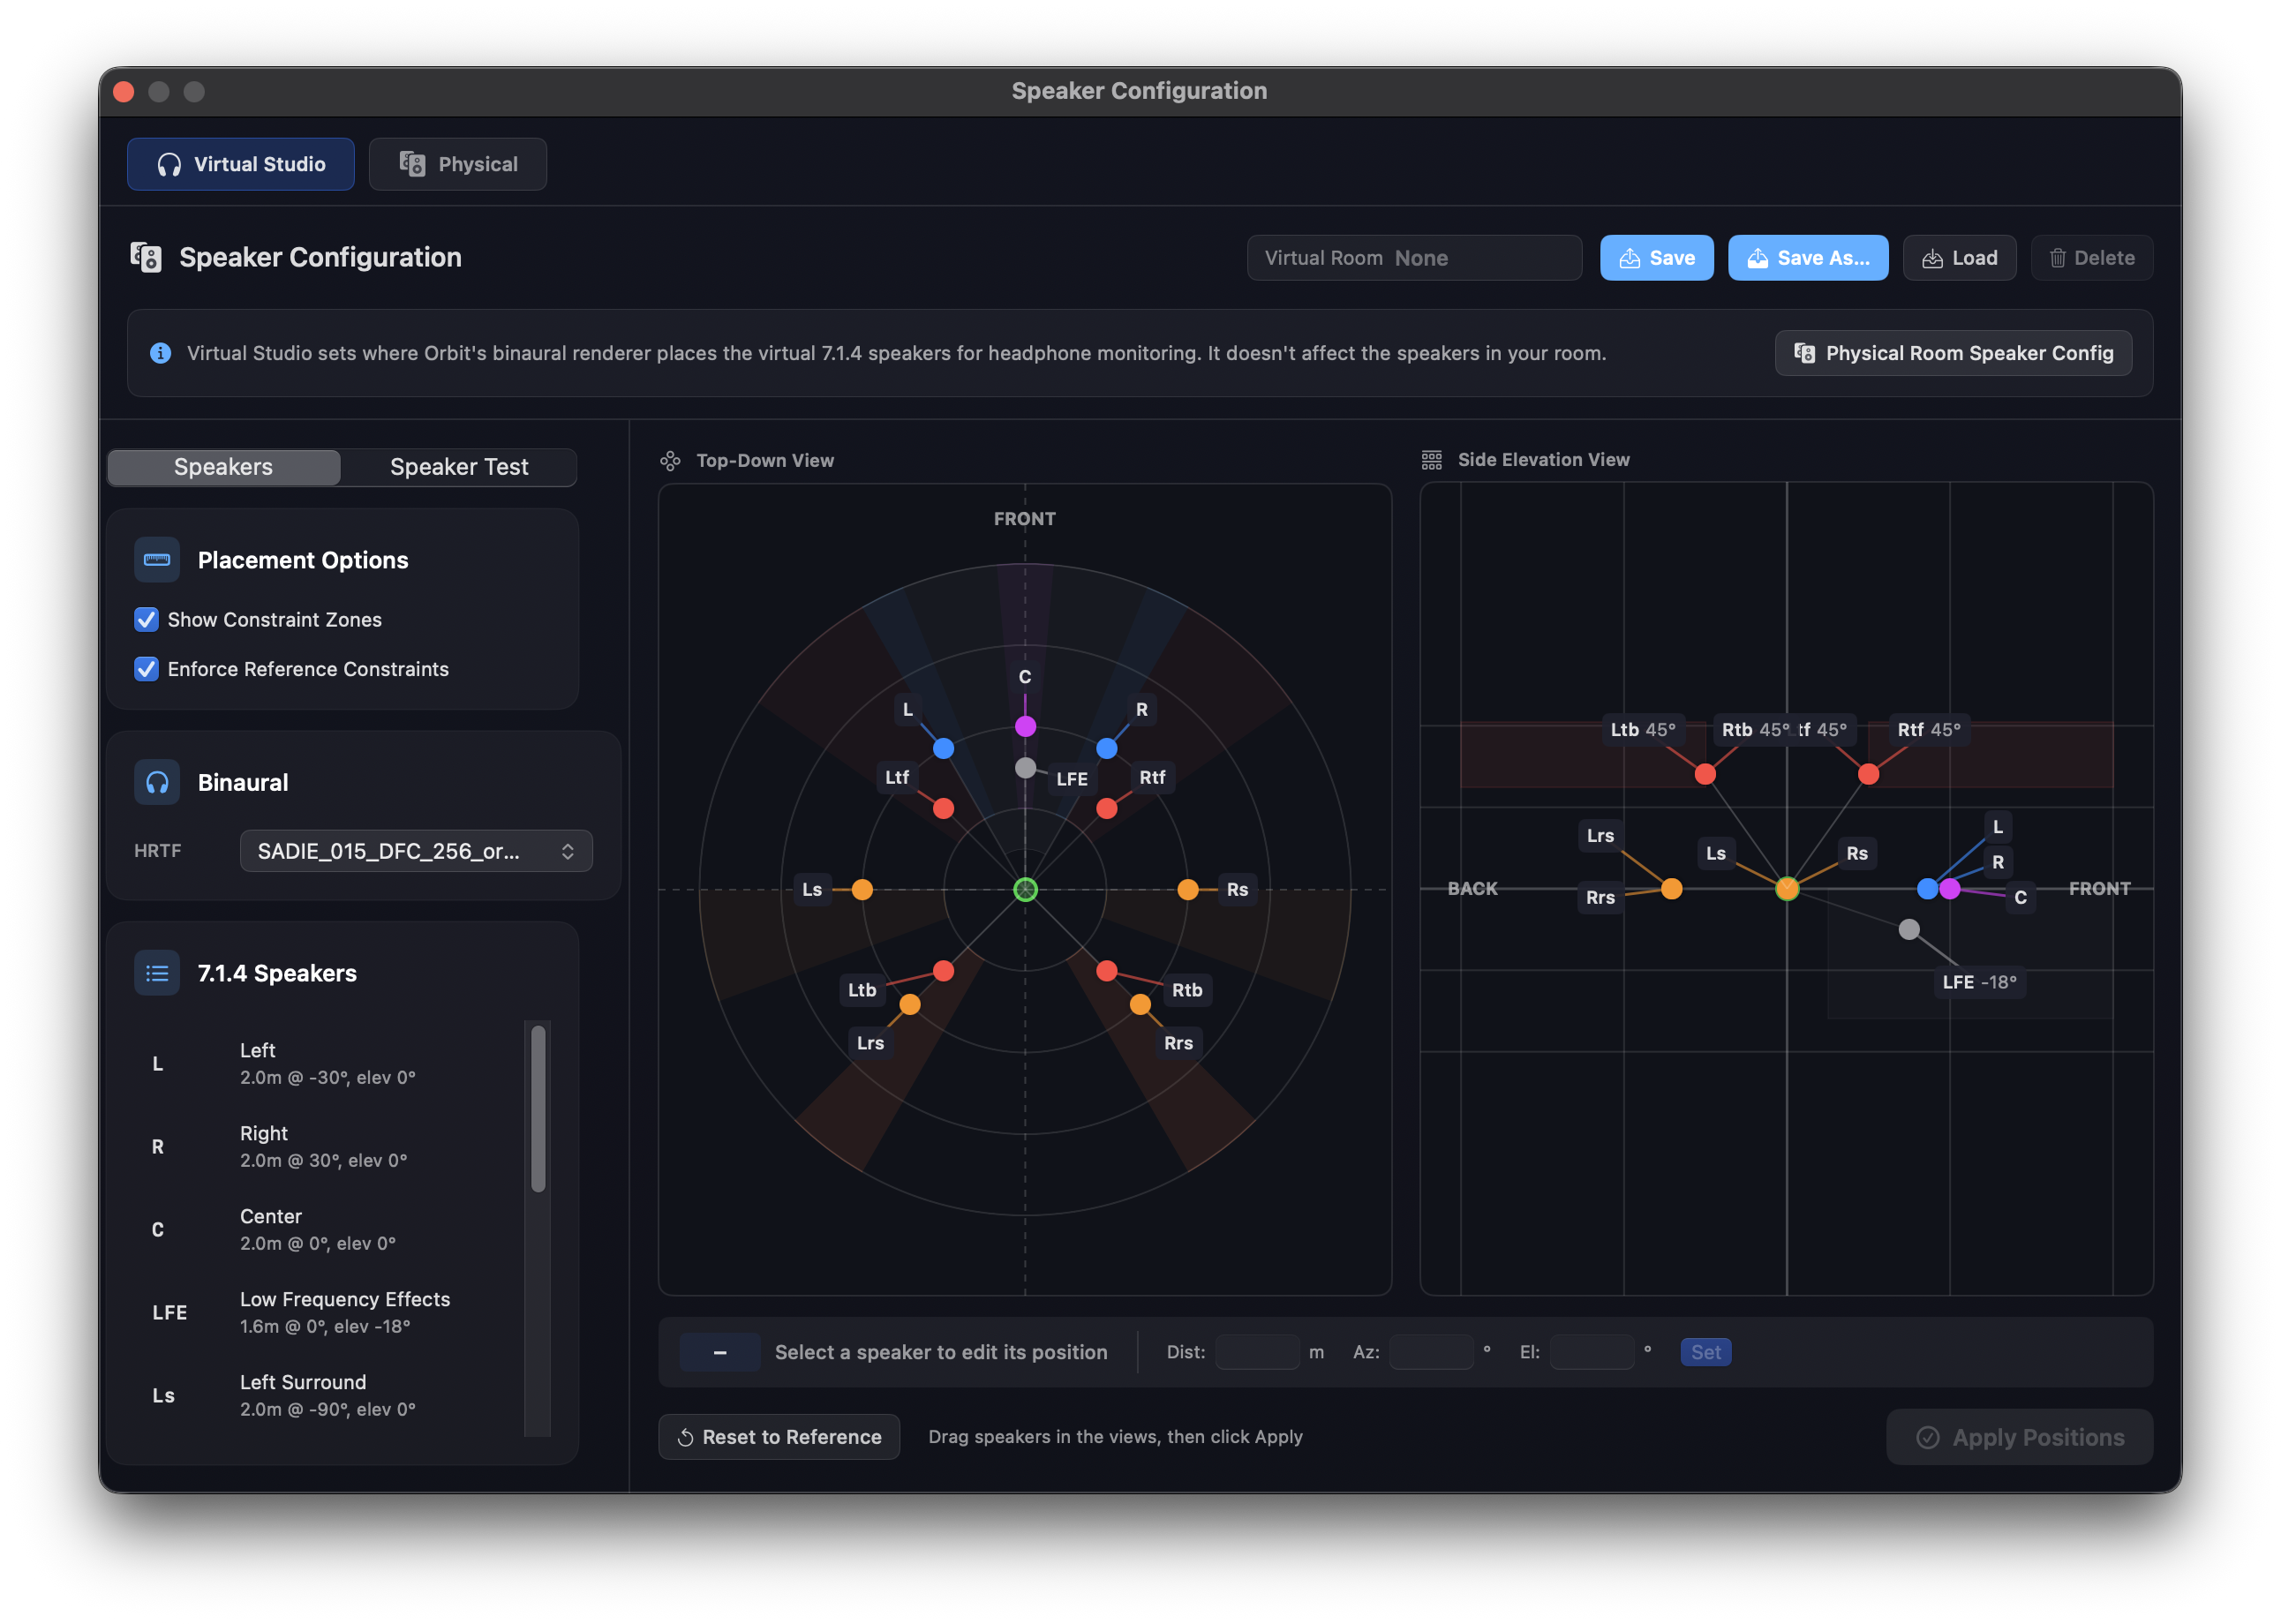
Virtual Studio configures Orbit's virtual 7.1.4 studio — the room that binaural rendering places around your head. These speakers are virtual, so nothing here depends on your audio interface, and the speaker test works whatever you have plugged in.
If you want to calibrate real speakers in a real room, that's the Physical tab.
Moving speakers
Drag speakers in the Top-Down View and Side Elevation View, or select one and type exact Azimuth, Elevation and Distance values. Nothing is heard until you press Apply Positions — the button lights up only when there is something to apply, and applying doesn't close the window, so you can keep adjusting.
Playback must be paused to move speakers; Orbit says so rather than letting you drag against a live render.
Placement Options adds two aids:
- Enforce Reference Constraints — keeps each speaker inside the angular zone the reference 7.1.4 layout allows for it.
- Show Constraint Zones — draws those zones in the views.
Reset to Reference puts every virtual speaker back at its reference position.
HRTF profile
The HRTF control sits beside the views, so you can change head model without leaving the window. It lists the Built-in profiles and, underneath, an Imported section holding every SOFA profile in your HRTF Library.
Speaker Test
Click Speaker Test and Orbit sends pink noise to one virtual speaker at a time, so you can hear where each one sits in the binaural image.
Virtual Rooms
A set of virtual speaker positions can be saved as a Virtual Room:
- Save — write the current positions to the room you have loaded.
- Save As… — save them as a new named room.
- Load — a System Preset (Reference 7.1.4 Layout, Orbit Custom Layout) or one of your saved rooms.
- Delete — remove a saved room. Orbit asks first.
Physical
The Physical tab calibrates the real speakers in your room: Distance, Delay and Gain per speaker.
Output Layout
The Output Layout menu at the top is the same layout selector as everywhere else — it reads from and writes to Speaker Layout & Routing, so switching layout here switches it for the whole app.
Calibration is per speaker, not per layout
This is the important part:
TIP
Calibration belongs to the speaker, not to the layout. Set your heights on 5.1.4 and they are the same heights on 7.1.4 and 9.1.6.
That matches how a room actually works — Ltf is in the same place, at the same distance, whichever layout you're monitoring. Changing layout no longer means recalibrating, and any calibration you saved under an older version is merged into the shared set automatically the first time you open the tab.
Time alignment and the Delay Table
Switch to the Delay Table view to align the room in one pass:
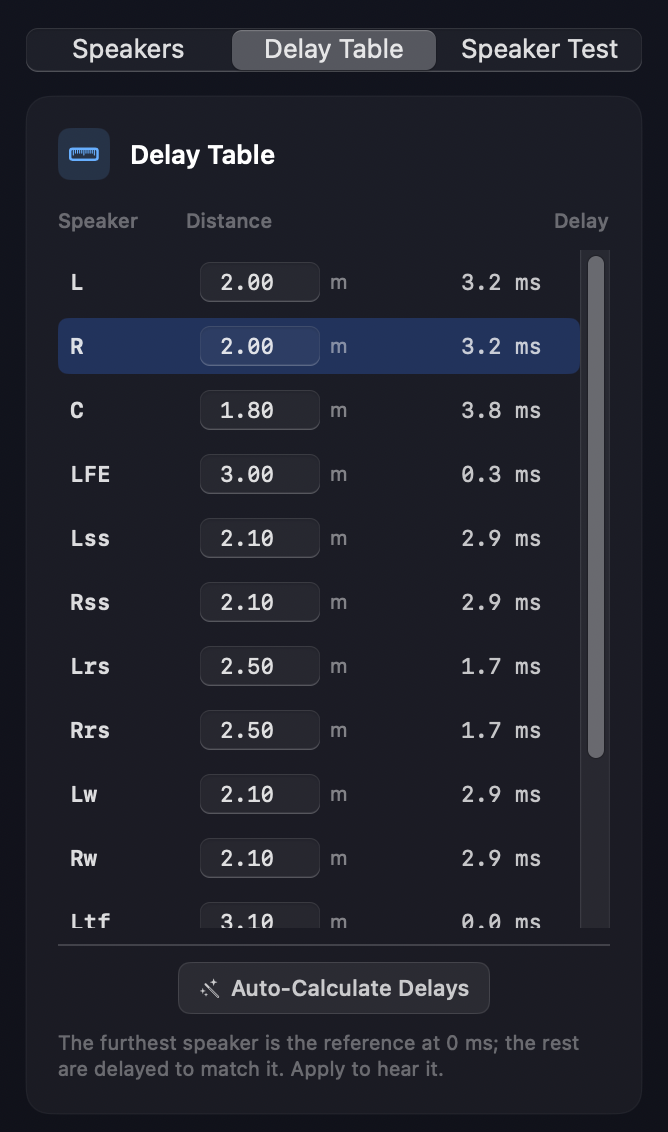
- Type the distance from your listening position to each speaker.
- Press Auto-Calculate Delays.
The furthest speaker becomes the reference at 0 ms and every nearer speaker is delayed to match it — above, Ltf at 3.10 m is the reference, and LFE at 3.00 m needs only 0.3 ms while C at 1.80 m needs 3.8 ms — so sound from all of them arrives together. (Delaying each speaker by its own distance, which is the intuitive-looking version, delays the far speaker most and makes the alignment worse.)
Auto-calculate is the only thing that writes delays in bulk. Values never change on their own when you change layout or select a speaker — if you've dialled a delay in by ear, it stays dialled in.
To set one speaker's delay by hand, select it on the Speakers view and tick Manual. The Delay field is read-only until you do, because normally it's the figure auto-calculate worked out from the distance; ticking Manual hands you the field and takes that speaker out of the calculation. The Delay Table shows Manual delay — set on the Speakers view for any speaker in that state, rather than a field that would silently do nothing.
Speaker Test
Speaker Test sends pink noise to one speaker at a time at the −20 dBFS calibration reference, through your real routing. A speaker that stays silent, or answers from the wrong side of the room, is a patch or a cable — not something to guess at. Transport playback must be stopped to run a test.
Views
Top-Down View and Side View both show the rig, so you can check heights as well as plan. Selecting a speaker in either view, or in the Speakers list, opens it for editing — the editing panel is always on screen, greyed out until you pick a speaker, so the layout doesn't jump around as you work.
Rooms
The whole calibration saves as a named Room, with the same controls as Virtual Studio:
- Save — write the current calibration to the loaded room.
- Save As… — save it as a new room.
- Load — apply a saved room's calibration immediately, whatever layout you're on.
- Delete — remove a saved room, after a confirmation.
Rooms are useful for more than one studio: a main room, a mix stage and a desk setup can each be a Room, recalled in one click.
Reset to Defaults clears calibration back to the defaults — 2 m, no delay, no gain trim. Because calibration is shared, this resets only the speakers in the layout you're on; speakers that appear only in other layouts keep theirs.
Apply
Apply sends the calibration to the engine. It lights up only when there is something to apply — when nothing has changed it reads No changes to apply — and it doesn't close the window.
Related
- Output Routing & Devices — choose the device, patch outputs, and run the speaker test from Preferences.
- OSLS — Speaker Layouts — build or import a custom layout.
- Audio Preferences — HRTF Library, monitoring mode and binaural options.
- Monitoring Modes — multichannel, binaural, stereo.